

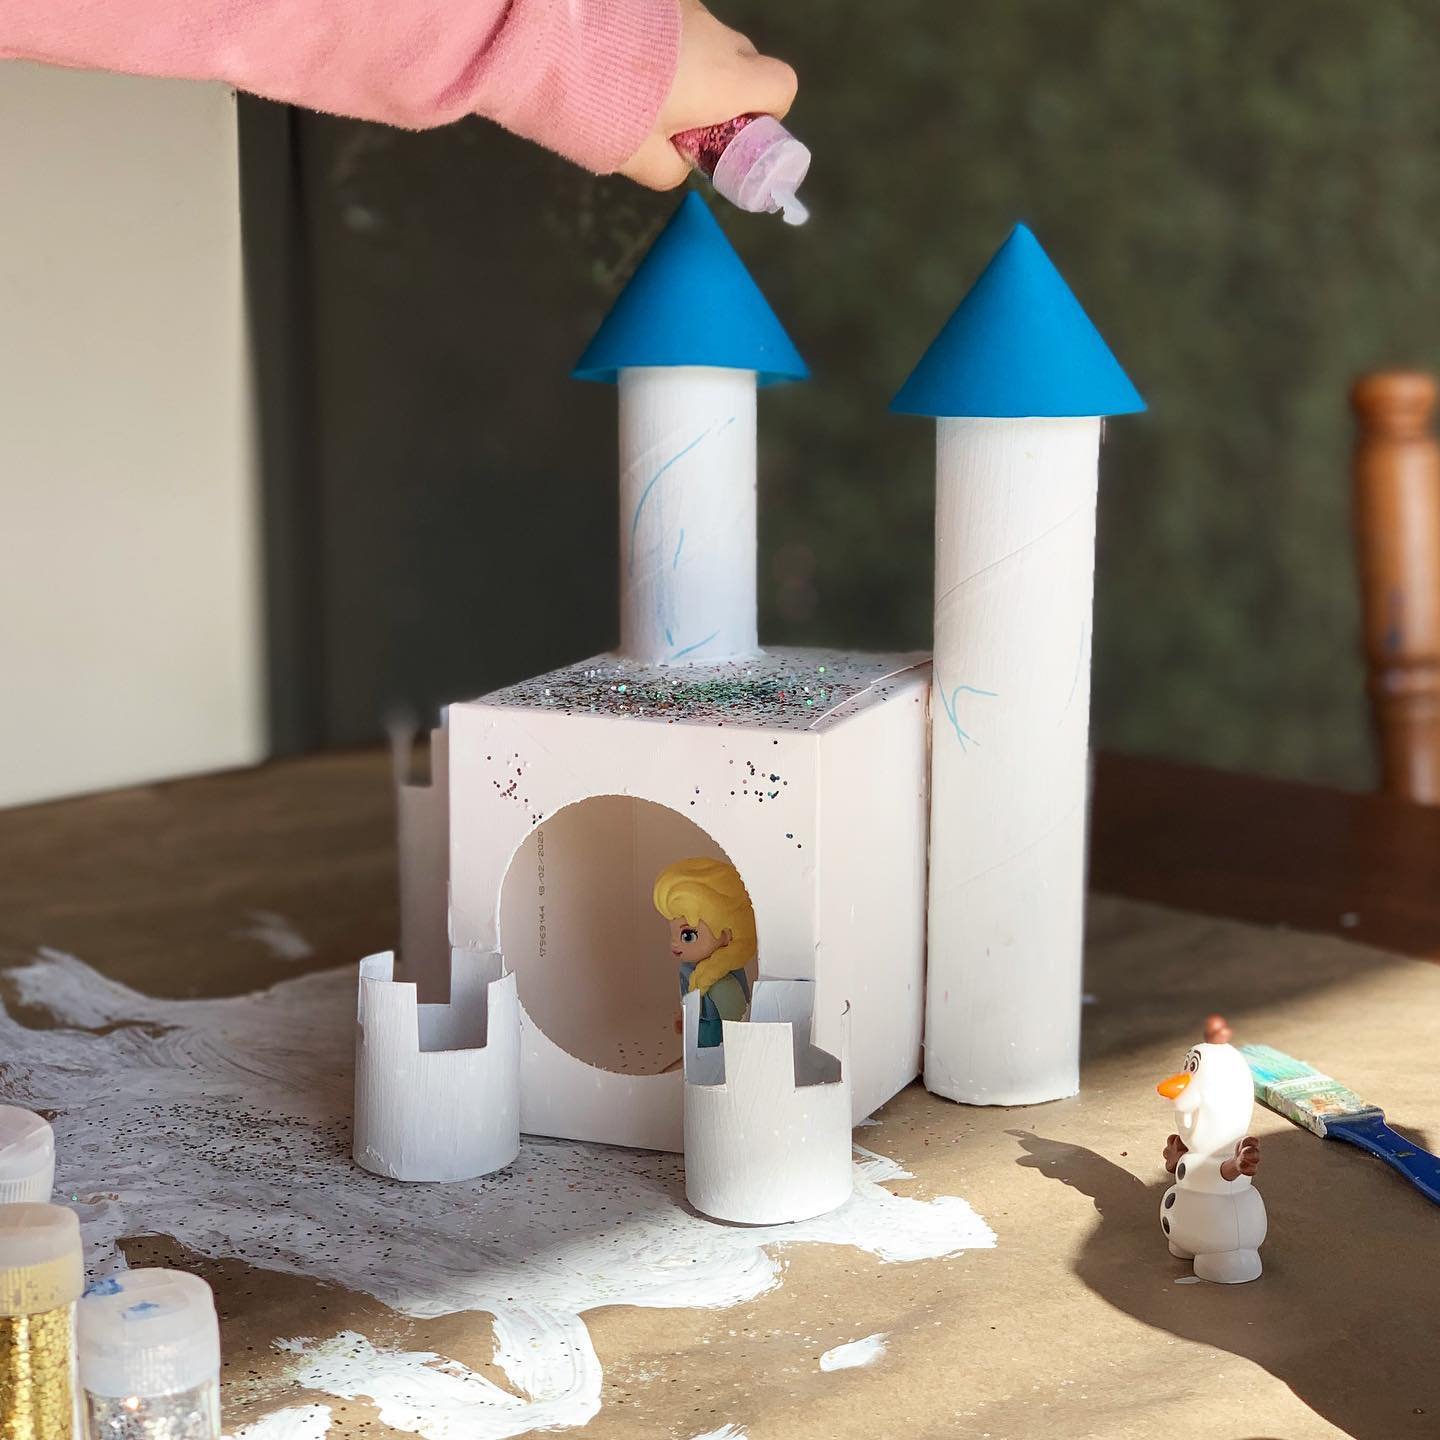
Castle
Best suited for older kids that can handle scissors & glue, they won’t even realise they are practising their counting and measurement skills! If you’re happy to help them with assembly, young ones will love decorating! The materials are a guide, so raid the recycle bin & use what you’ve got!
You will need:
⋒ 3 x toilet rolls
⋒ 1 x kitchen roll
⋒ Small box (tissue box)
⋒ Scissors
⋒ Glue
⋒ Sticky tape
⋒ Paint
⋒ Coloured card
For the turrets:
1. Take one toilet roll & cut it in half.
2. Cut 8 slits, roughly 1.5cm in length, around one edge of your 1/2 roll.
3. Fold every second flap down & snip off to create a turret shape.
4. Do the same to the other 1/2 roll, and one other tp roll to create three turrets.
Assemble your castle structure, glue in place (a glue gun is suuuper handy) & paint any colour you like!
For the spires:
1. Trace & cut out two circles roughly 12 cm in diameter (I traced around a kids cereal bowl).
2. Draw and cut out a triangle wedge roughly 1/3 of your circle.
3. Bring the cut sides of your circle together, line them up & tape in place. You’ve got a cone! Repeat for the second circle.
4. Glue your cones (spires) to the top of your two remaining towers.
Decorate as you like! Ours quickly became the ice castle with shimmery ice & snow (glitter, of course, glitter). Painting it white meant it was easy to add details with crayons & textas.
That Elsa is an absolute legend, but her LEGO ice castle is big-budget! Save some cash & make your own!
Have fun!
Courtney